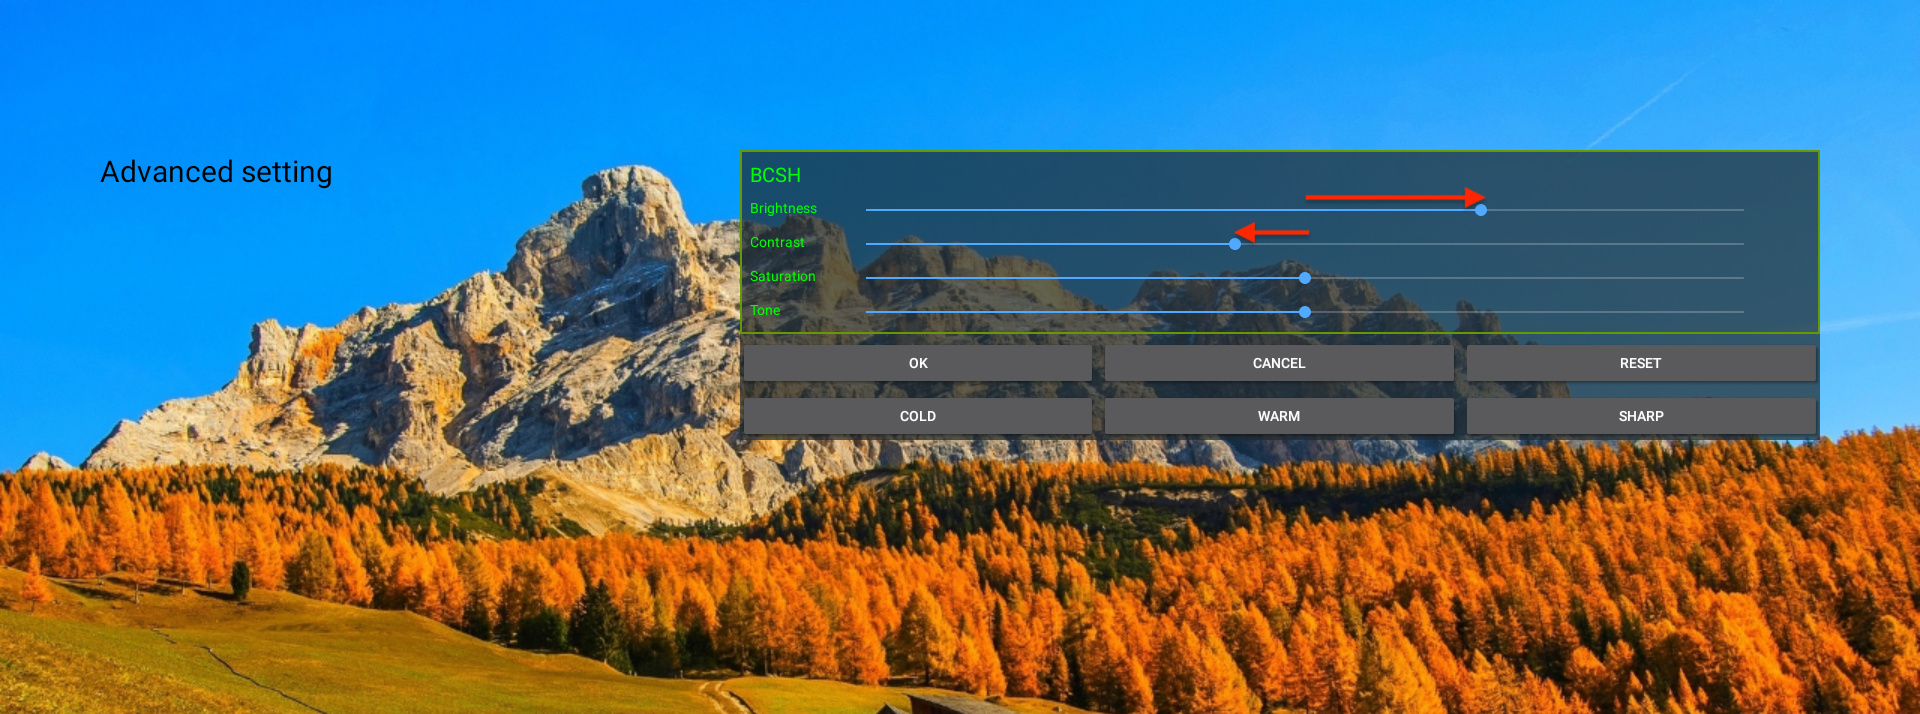
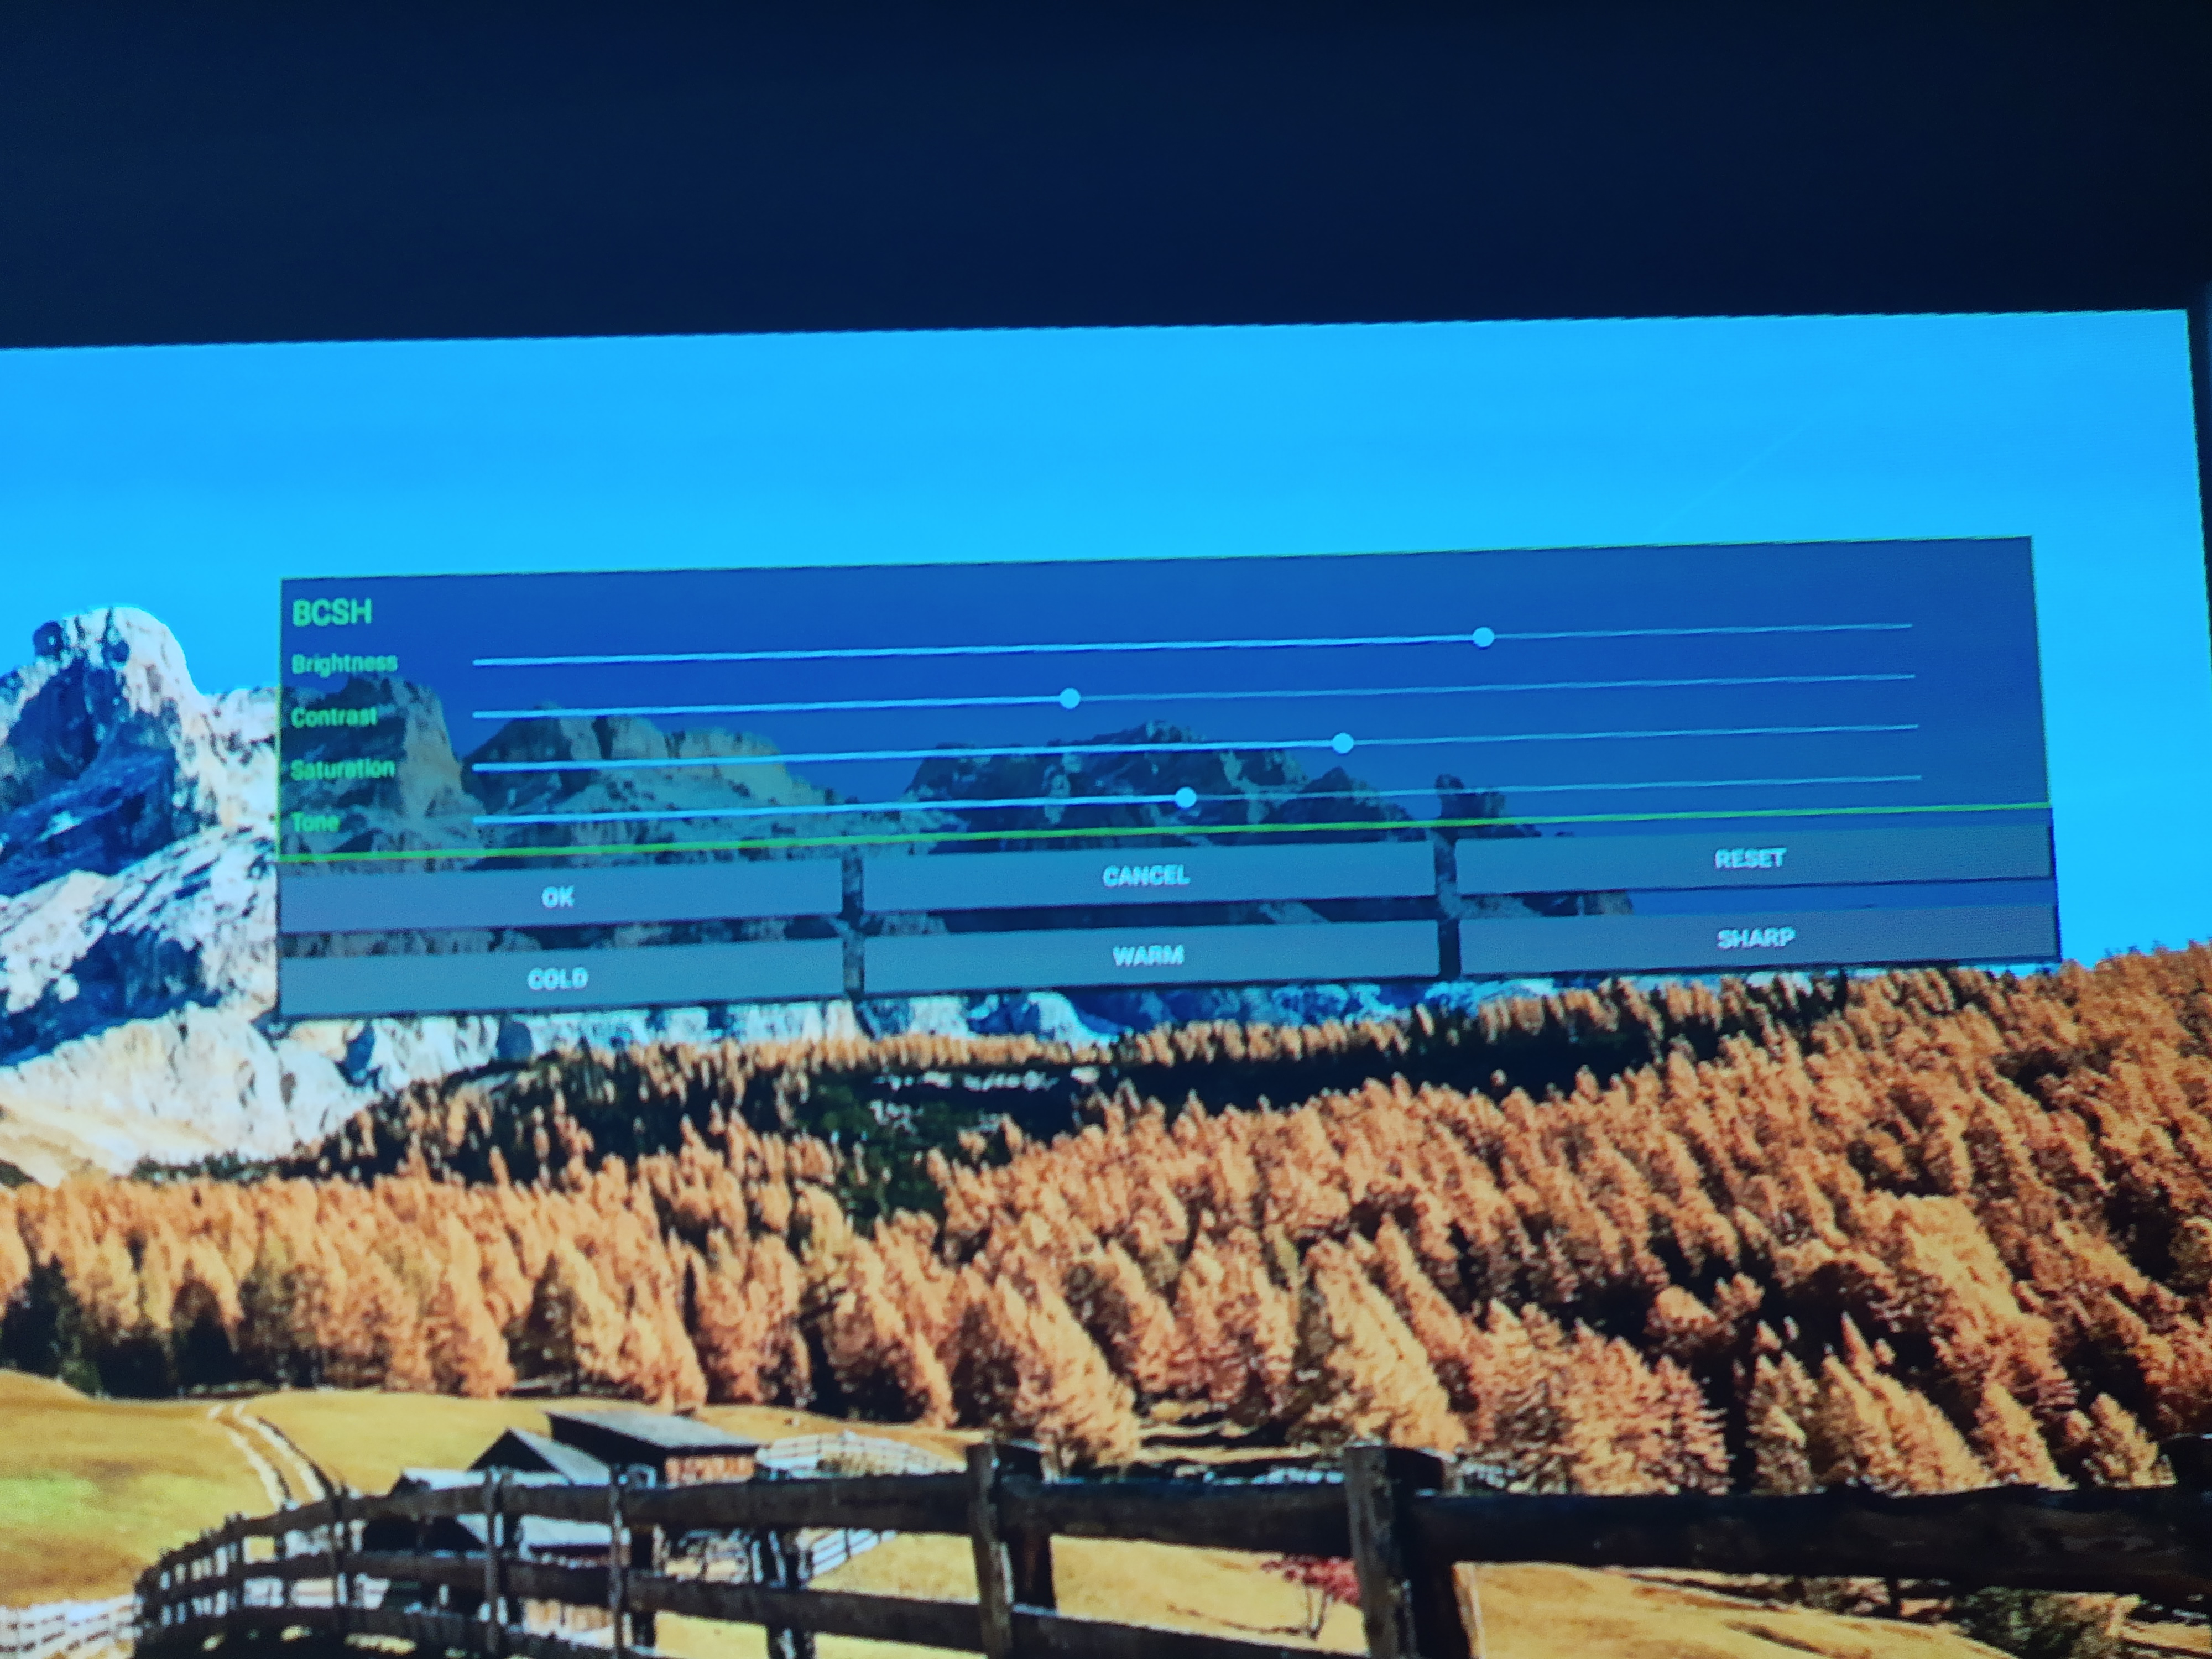
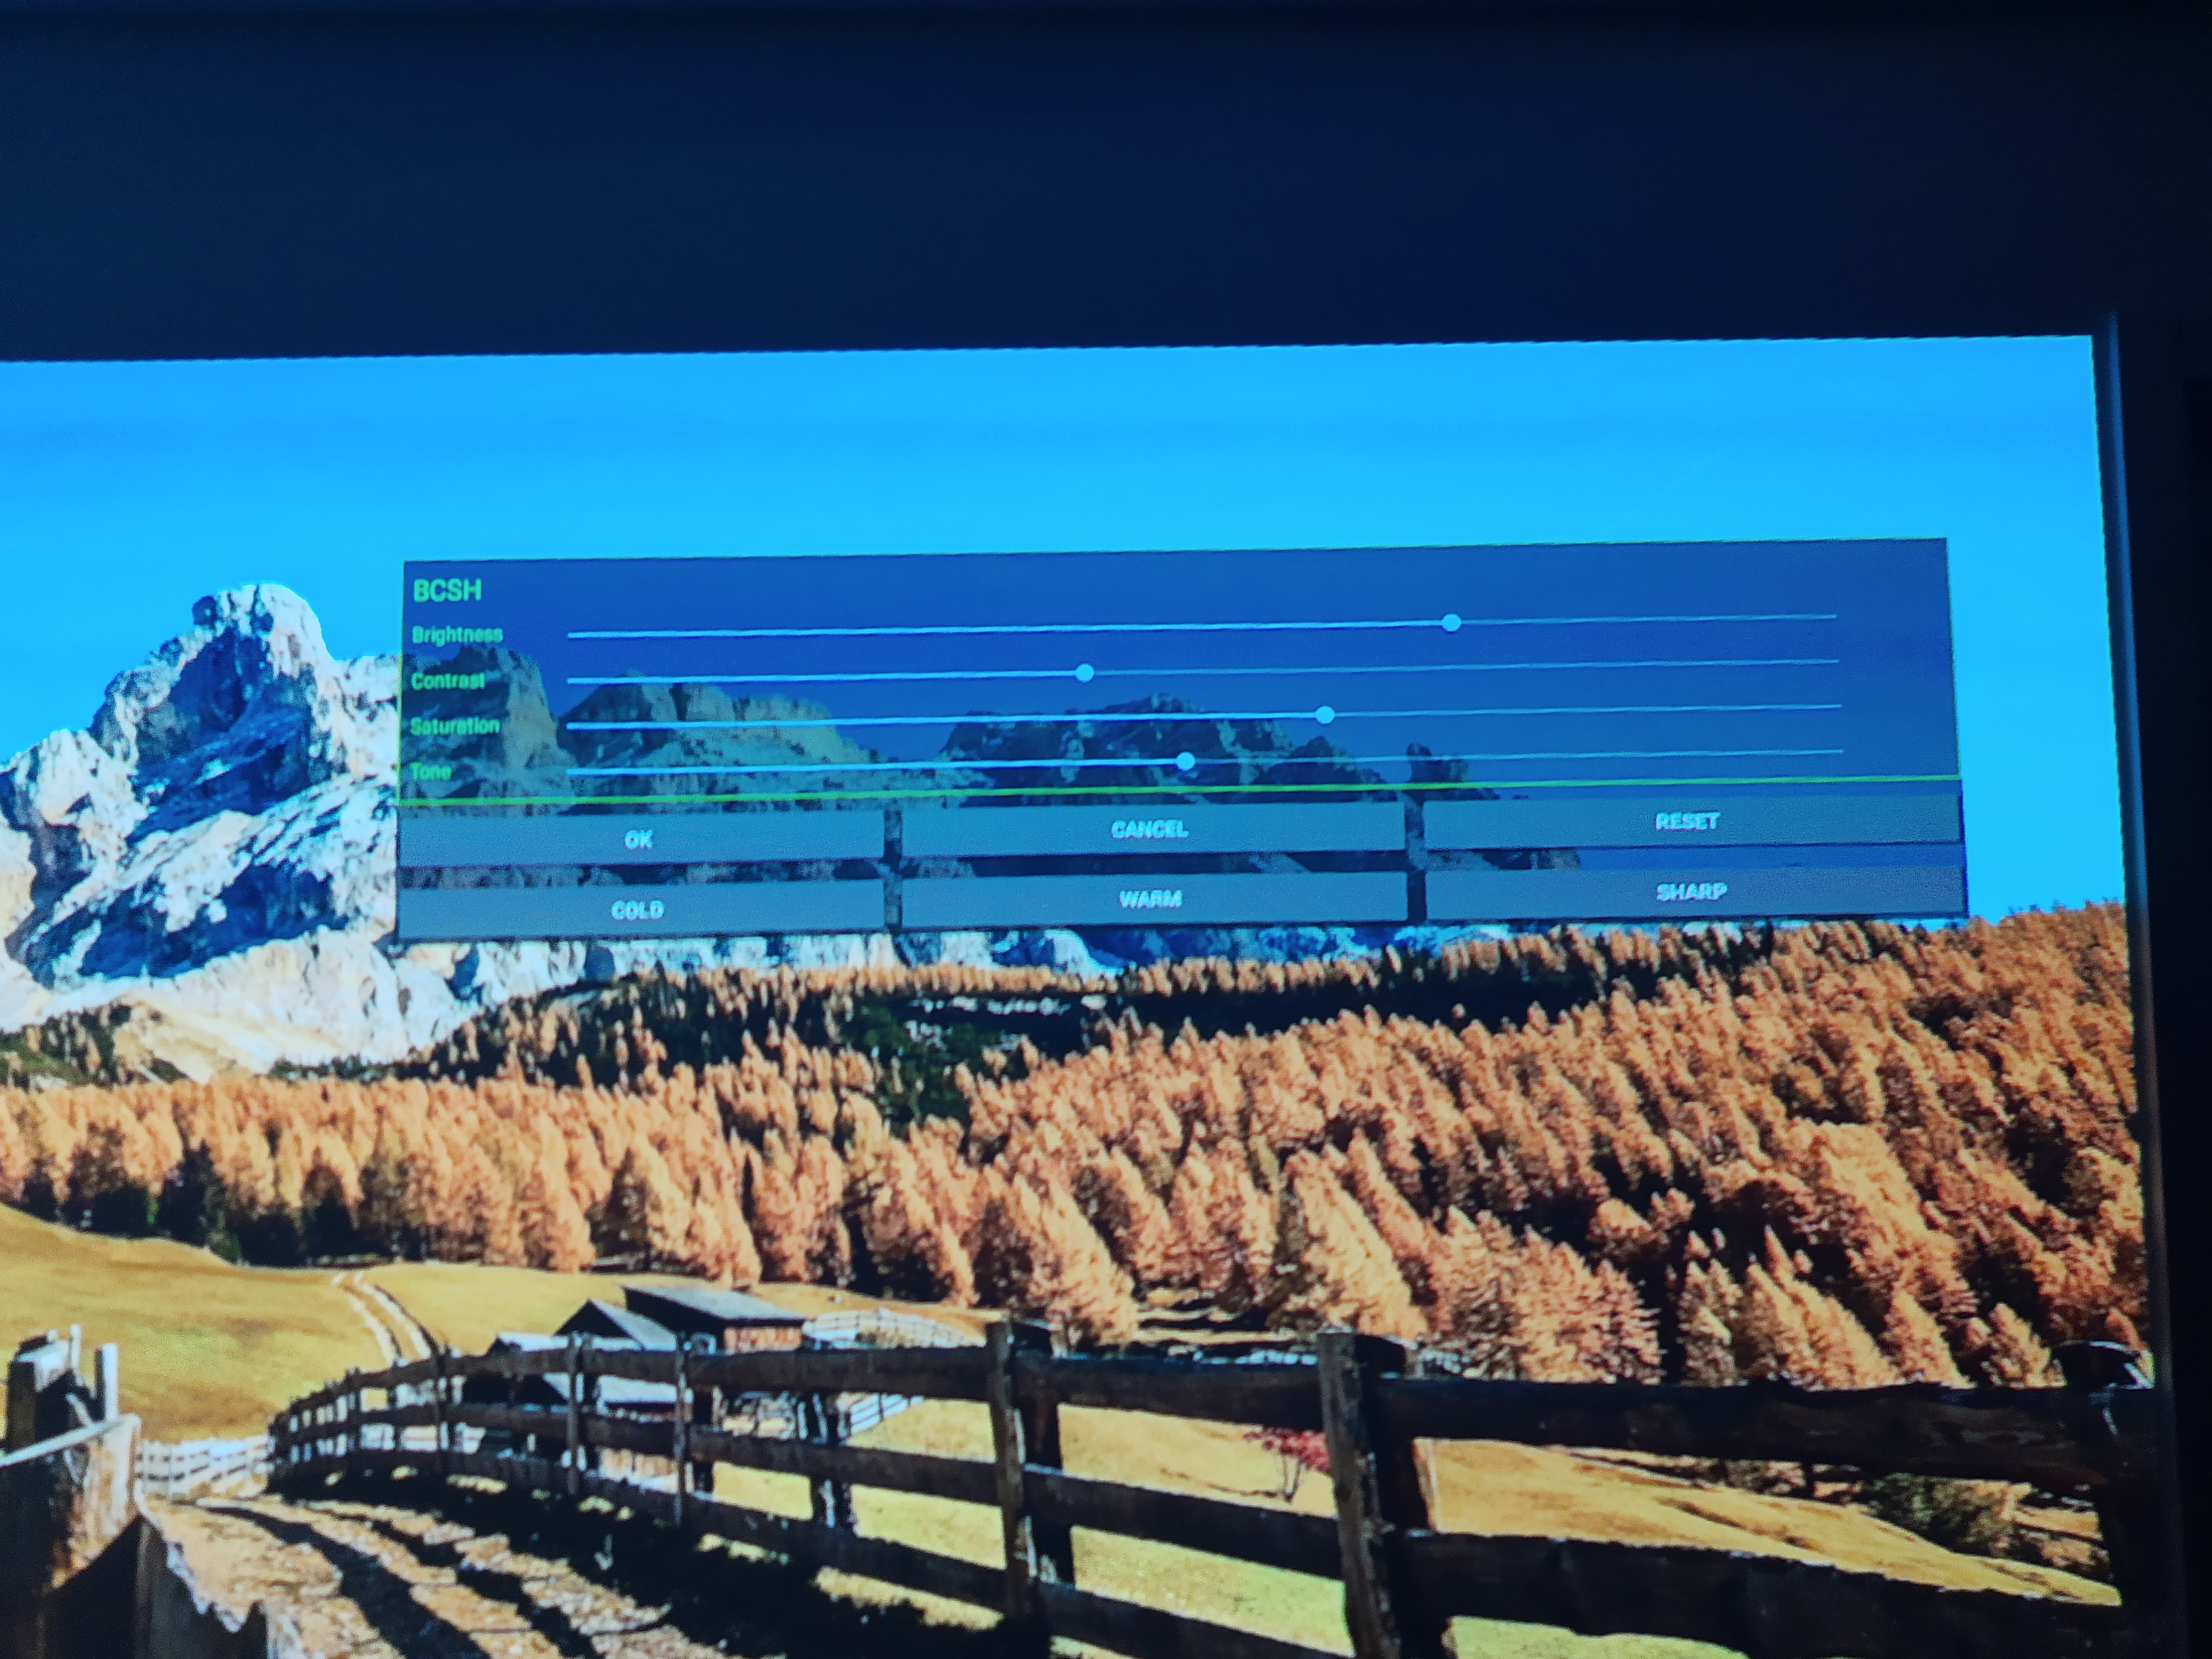
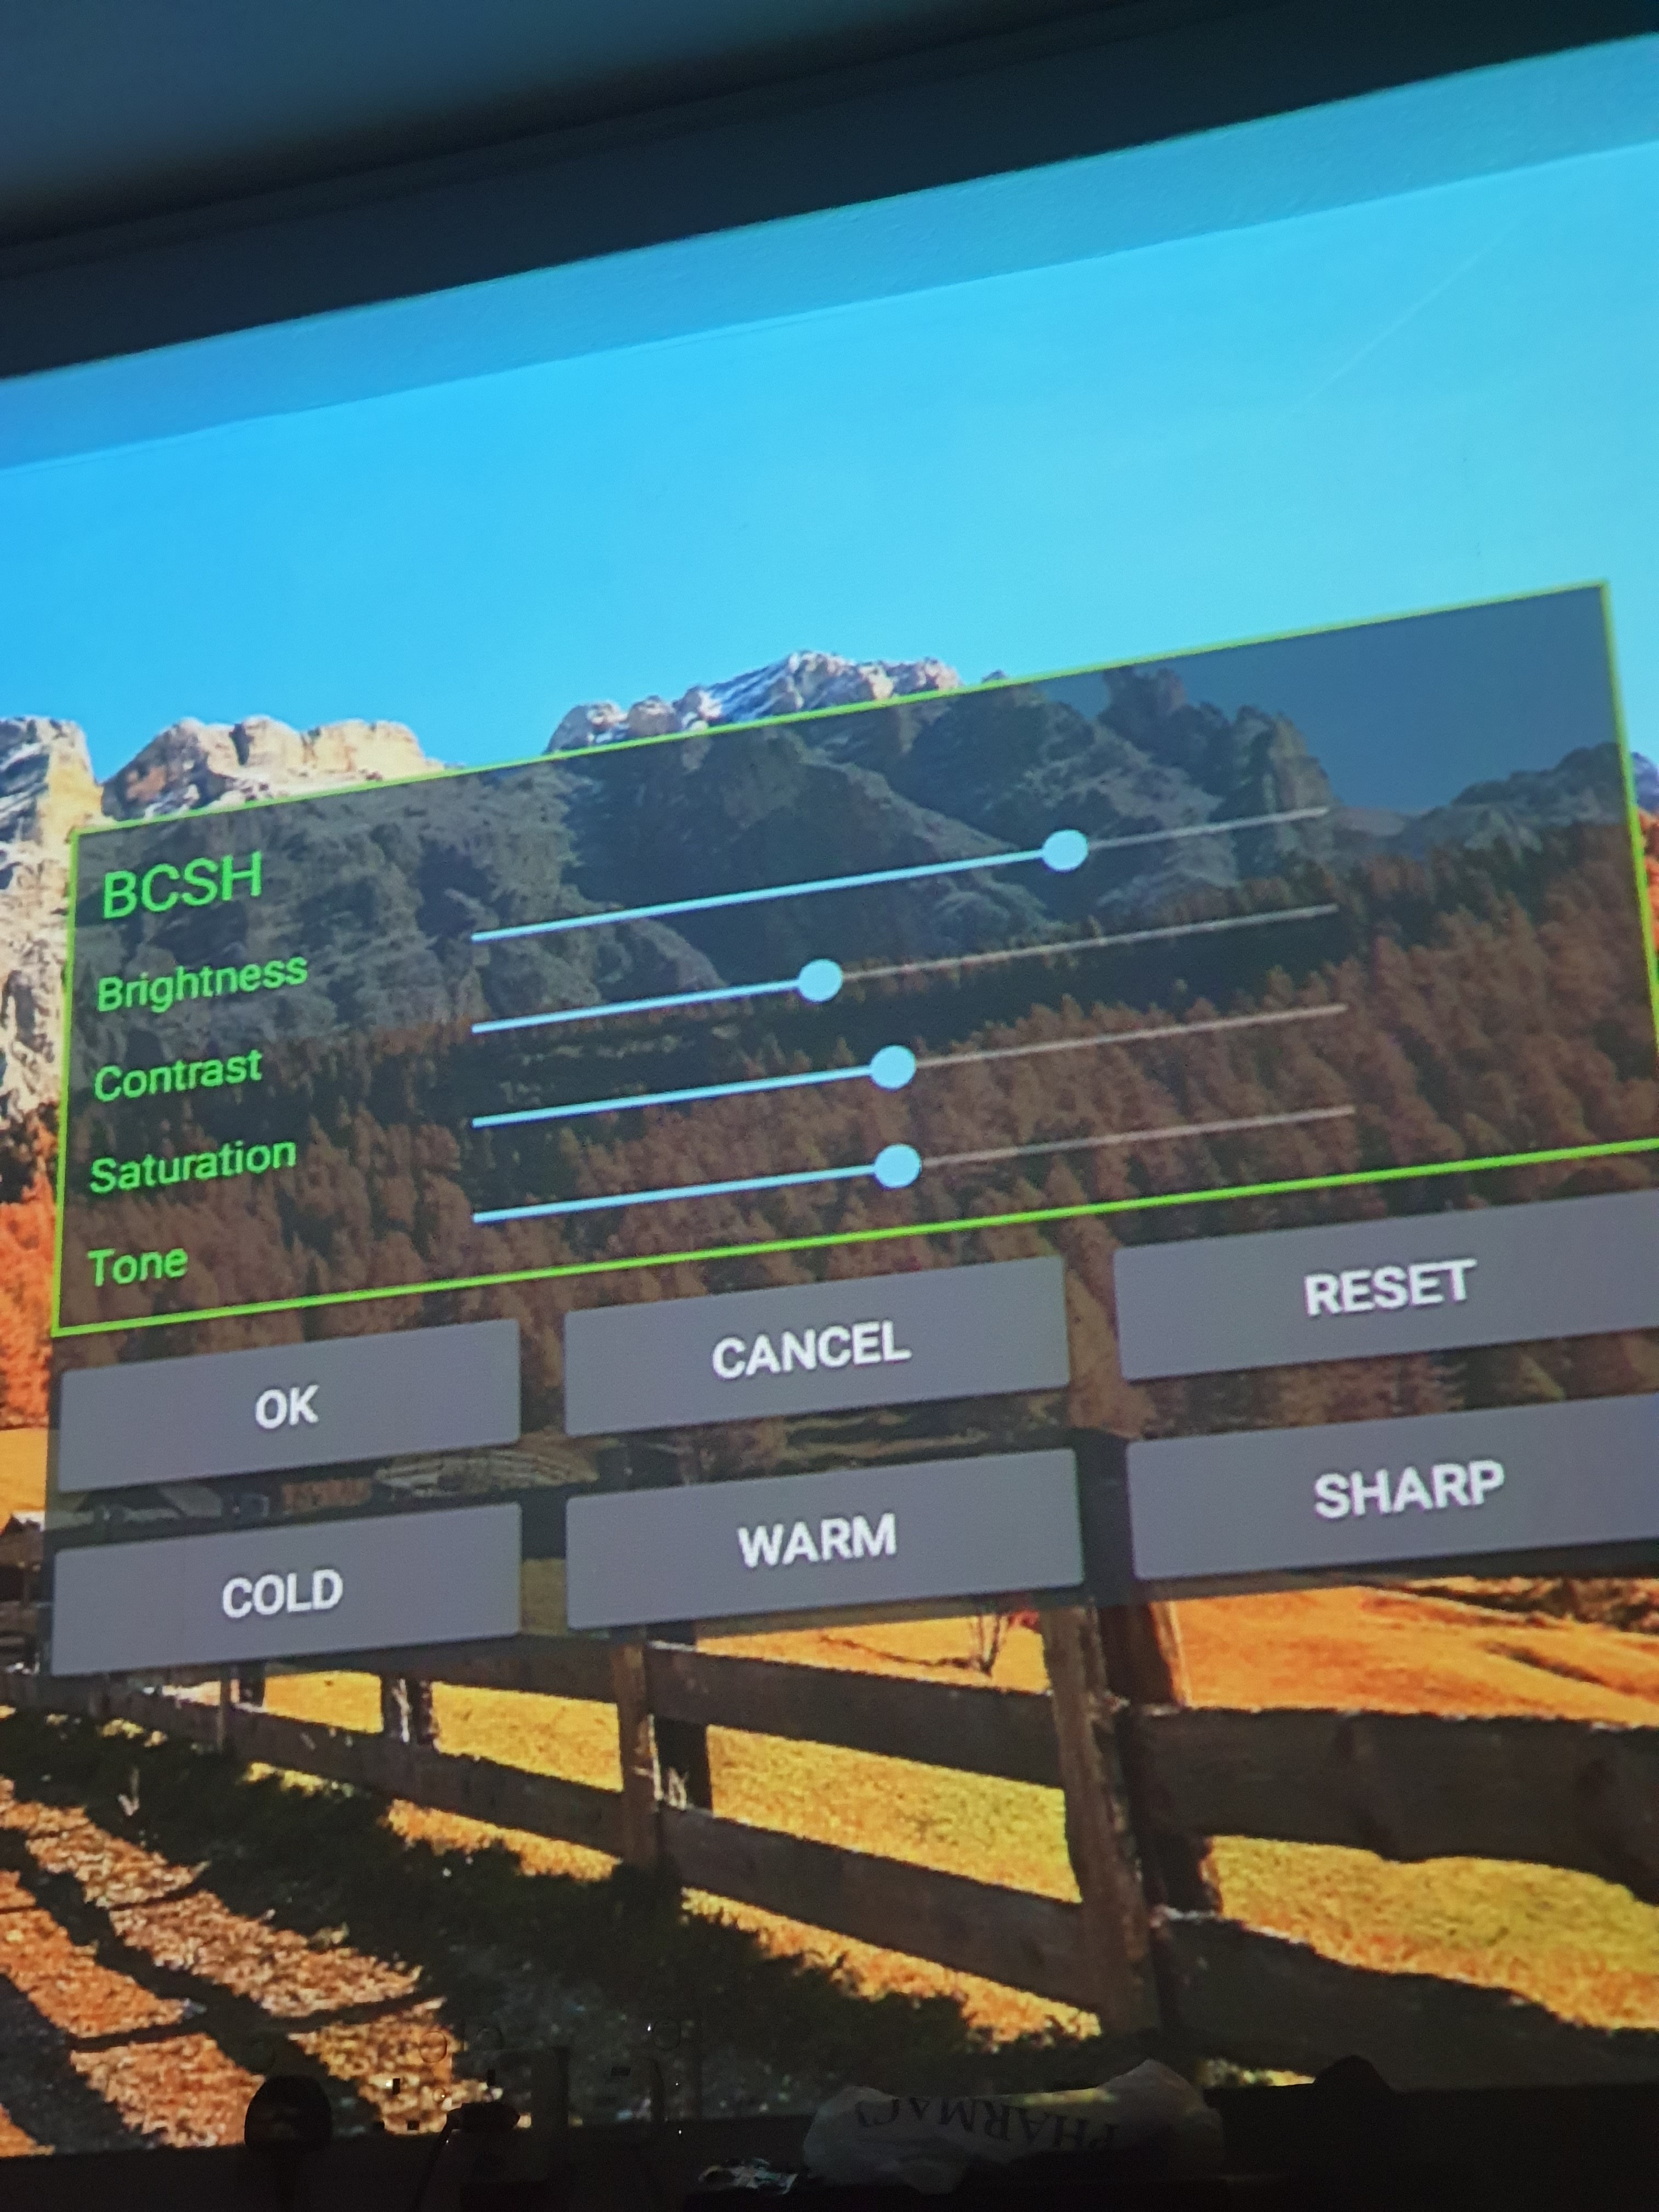
Click on RESET first, then increase the Brightness and decrease Contrast settings as follows, so that they’re approximately in the position you see in the screenshot:
Brightness should be a bit after the left edge of the RESET button.
Contrast should be a bit before the “C” of CANCEL.
This will match the internal content picture quality to external/HDMI colours. You can experiment with the Saturation knob if you want.
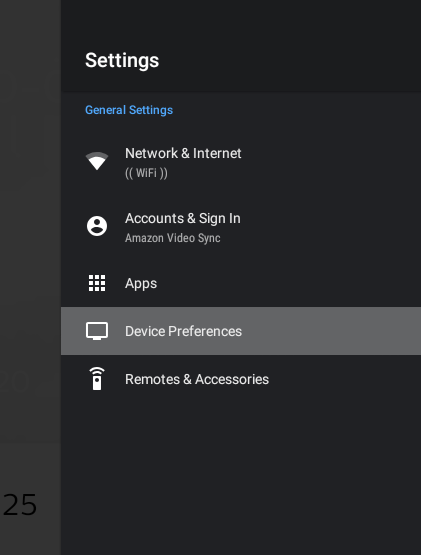
Background
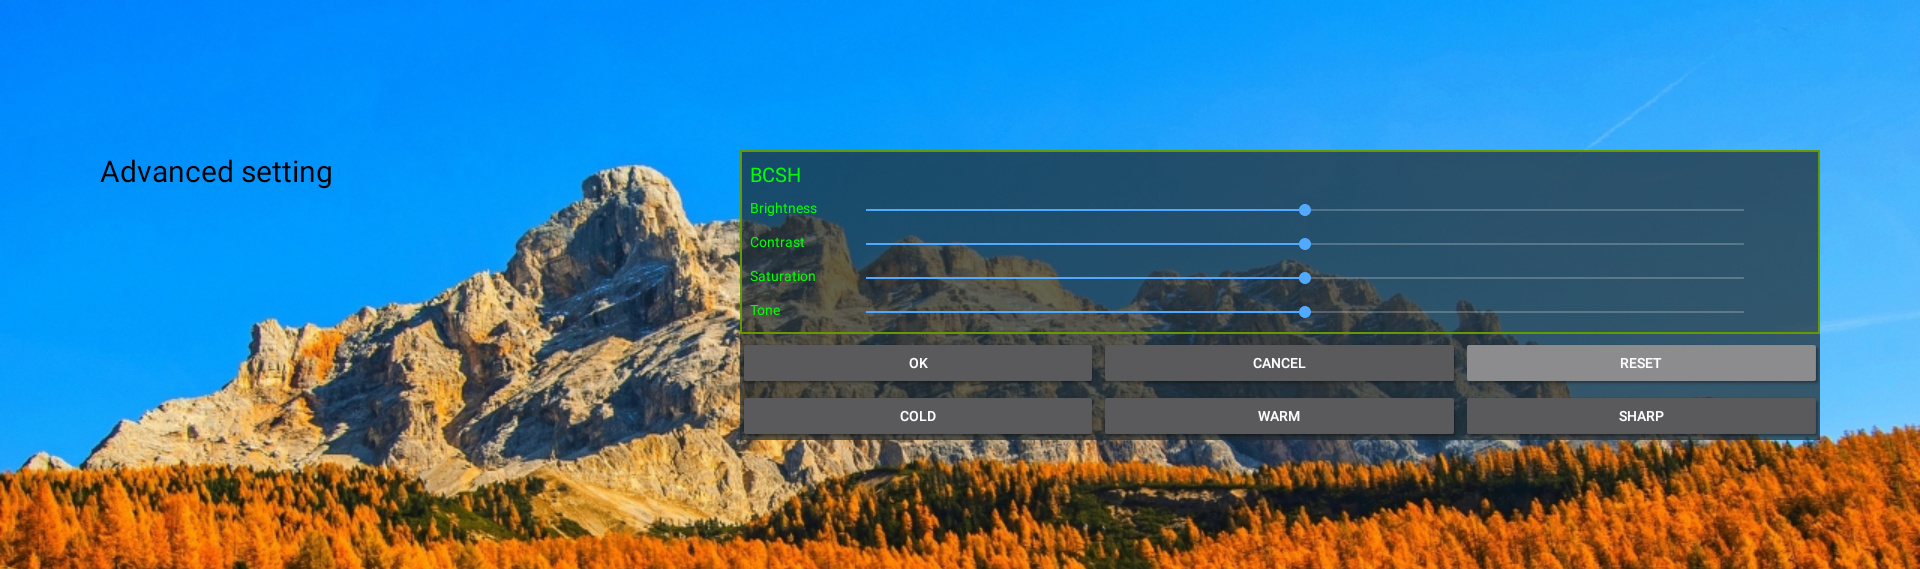
Due to a bug in the default Color Adjustment settings screen, the correct brightness/contrast parameters are not adjusted. This hidden screen lets you adjust the correct parameters which actually affects the colours.
In the next software update, we will correct it so that the above adjustments are the default. Till then you can make this manual adjustment.
@Philips_Support_P Don’t know if percentage is there or not since I haven’t received mine ppm yet. If not, I think adding a percentage at the end of sliders would be helpful for people to share their settings.
This app is not for public use. The Projector Settings > Image > Color Adjustments screen is supposed to be the correct way, it shows the % values. It just has a bug now such that the correct parameters are not adjusted, it will be corrected later.
I can confirm, that the much too dark movie scenes I noticed in VLC got much better with this settings. Not sure if picture quality is on pair with HDMI but it is close to. So this Information helped a lot improving internal picture quality.
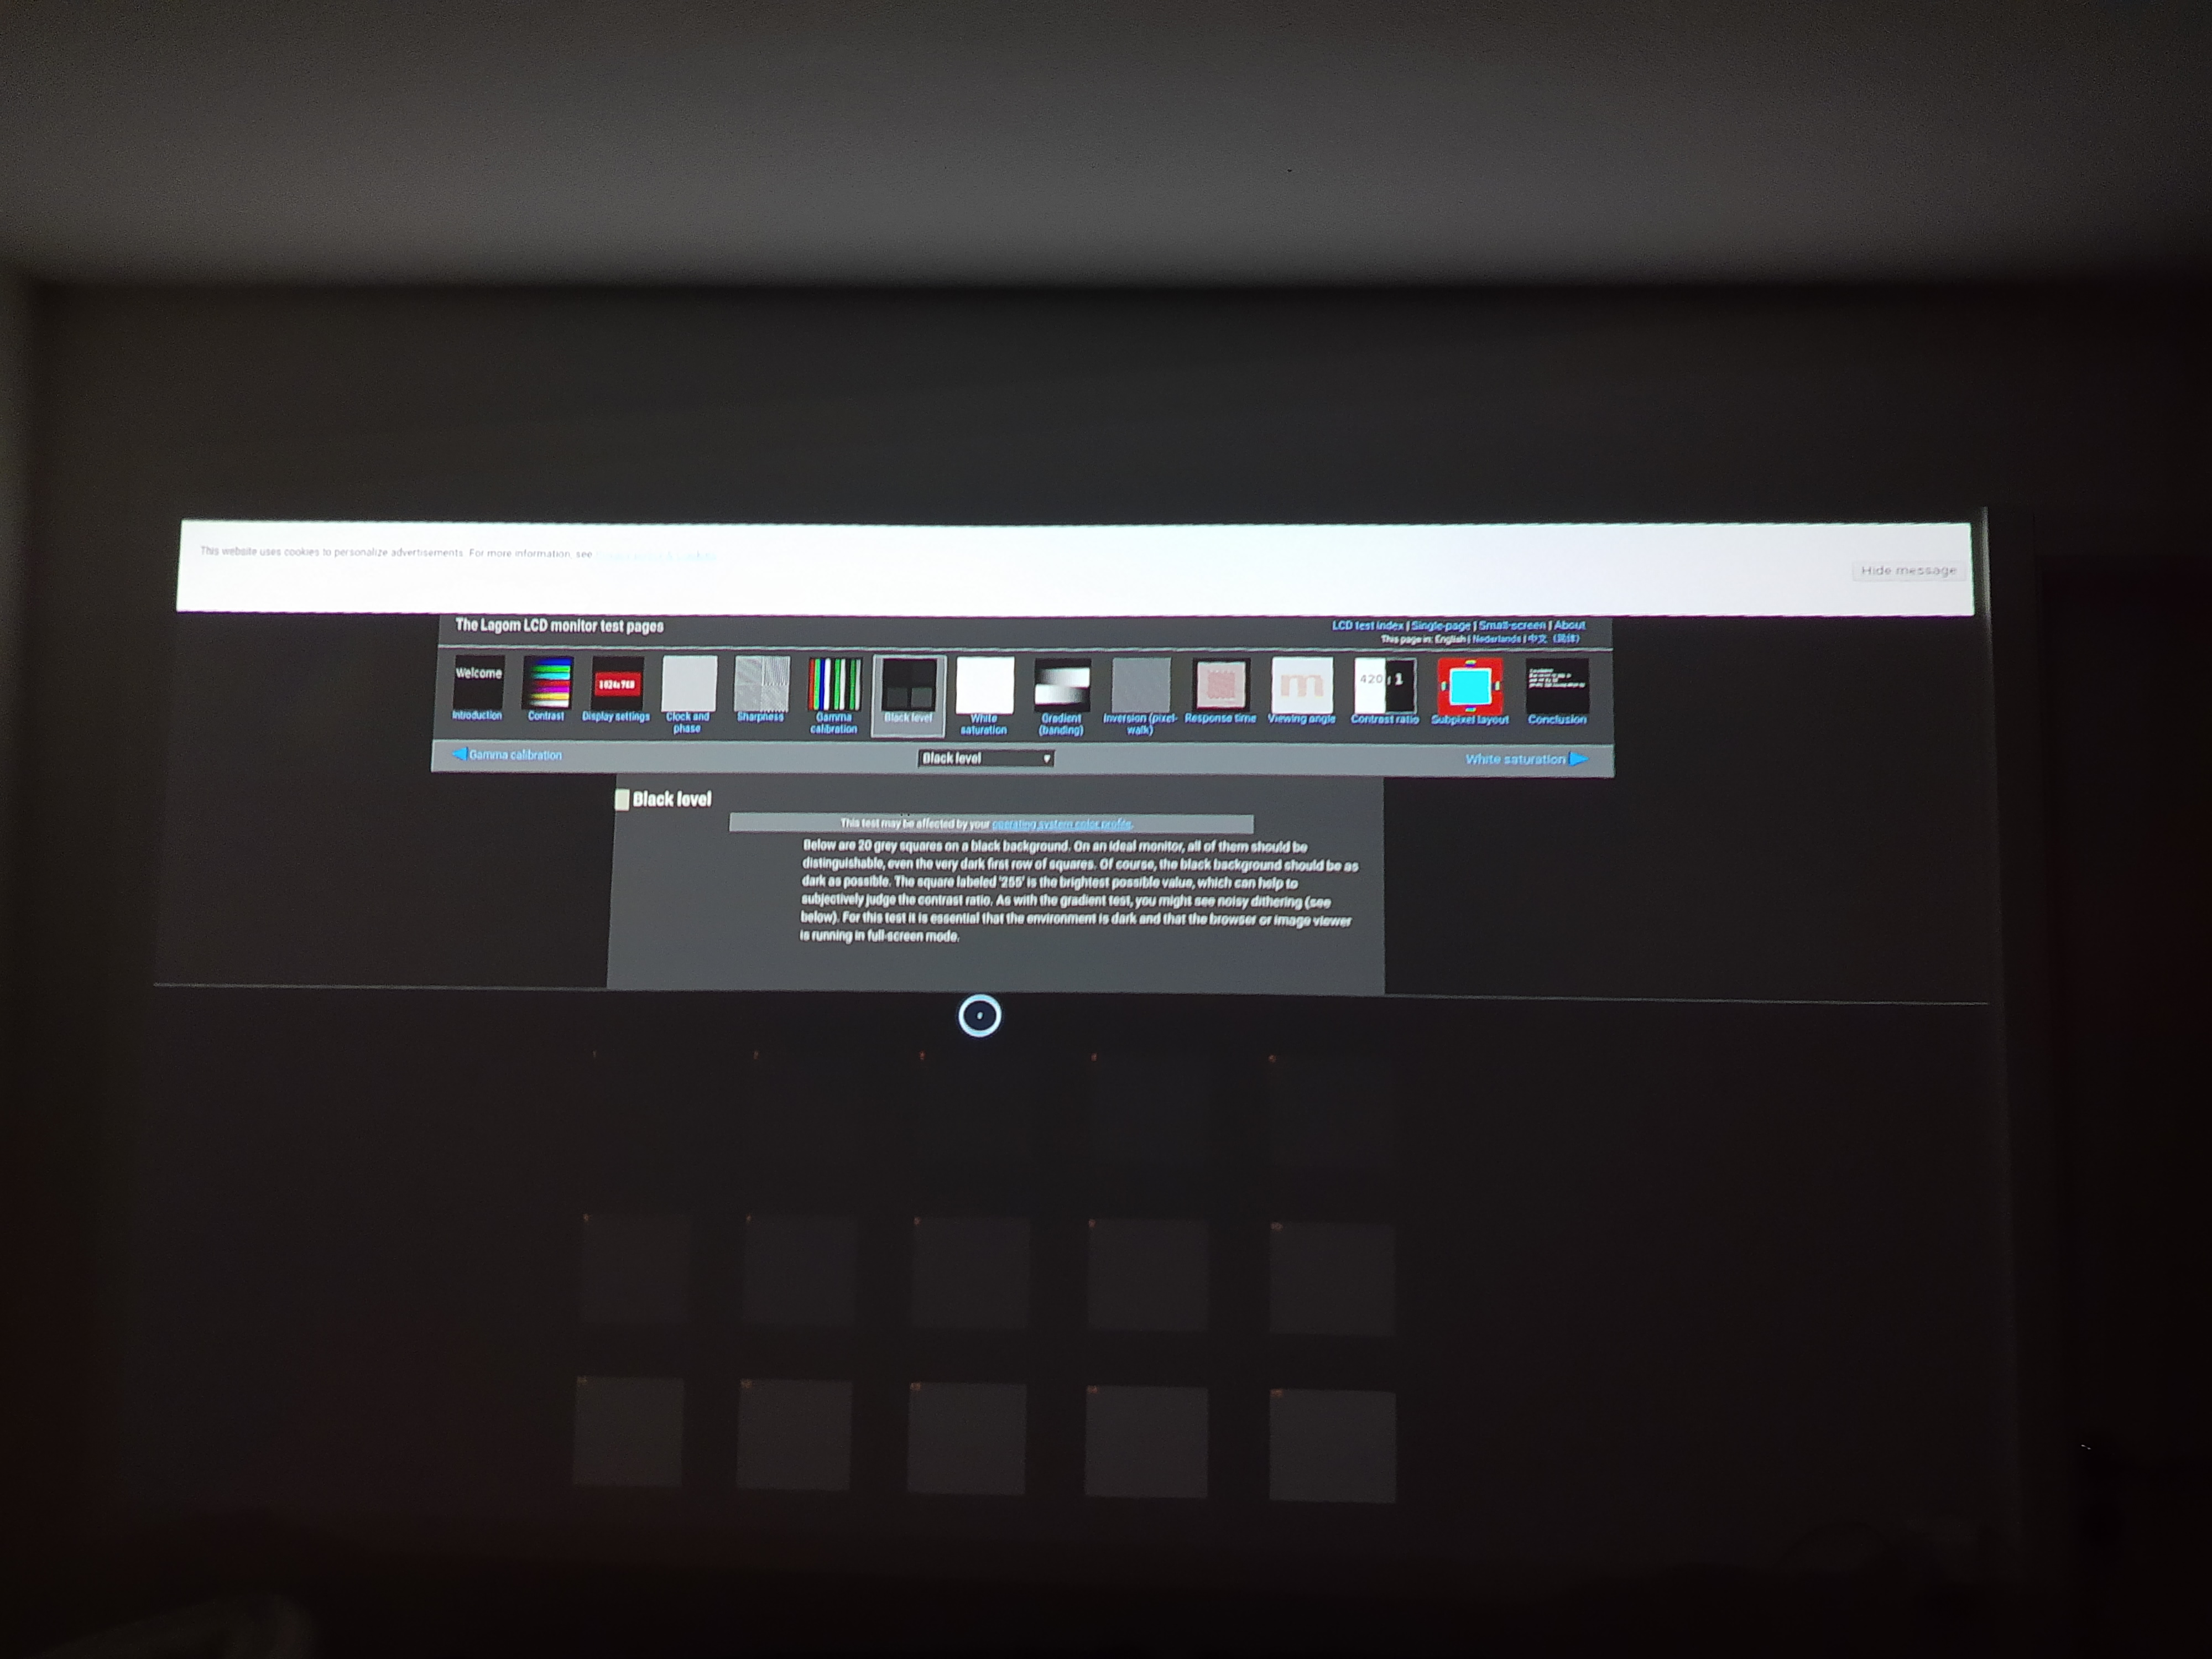
Hi i tried these advance settings in the hidden menu but firefox url check still returning “bad image” output with hardly very few squares slightly visible and that too only in the bottom most row. Do I have a faulty unit? Shall i proceed to formally seek a refund / replacement?
Post them here, I’d like to see what you mean. Try taking the pictures with a camera where you can record / manually fixate the picture parameters like shutter speed, aperture, and ISO. Then take pics of the same image from the same location (using a tripod for instance) at the different settings. Also try making the adjustments / taking the pics with the USB charger (dis)connected only (or both individually).
Plz note that above photos are taken post reset and making the suggested modifications. But still such bad result in a pitch dark room. Shall I request a refund/replacement for unit not delivering optimal image quality?
Did watch a movie on Netflix and white text is blurry for me, autofocus seems not to get that sharp did even try to manually focus but it’s not perfect appears abit blurry, did run it on battery (Economy setting)! Didn’t do any manual setting changes in hidden menu, will test to see if it gets sharper using the power supply connected.
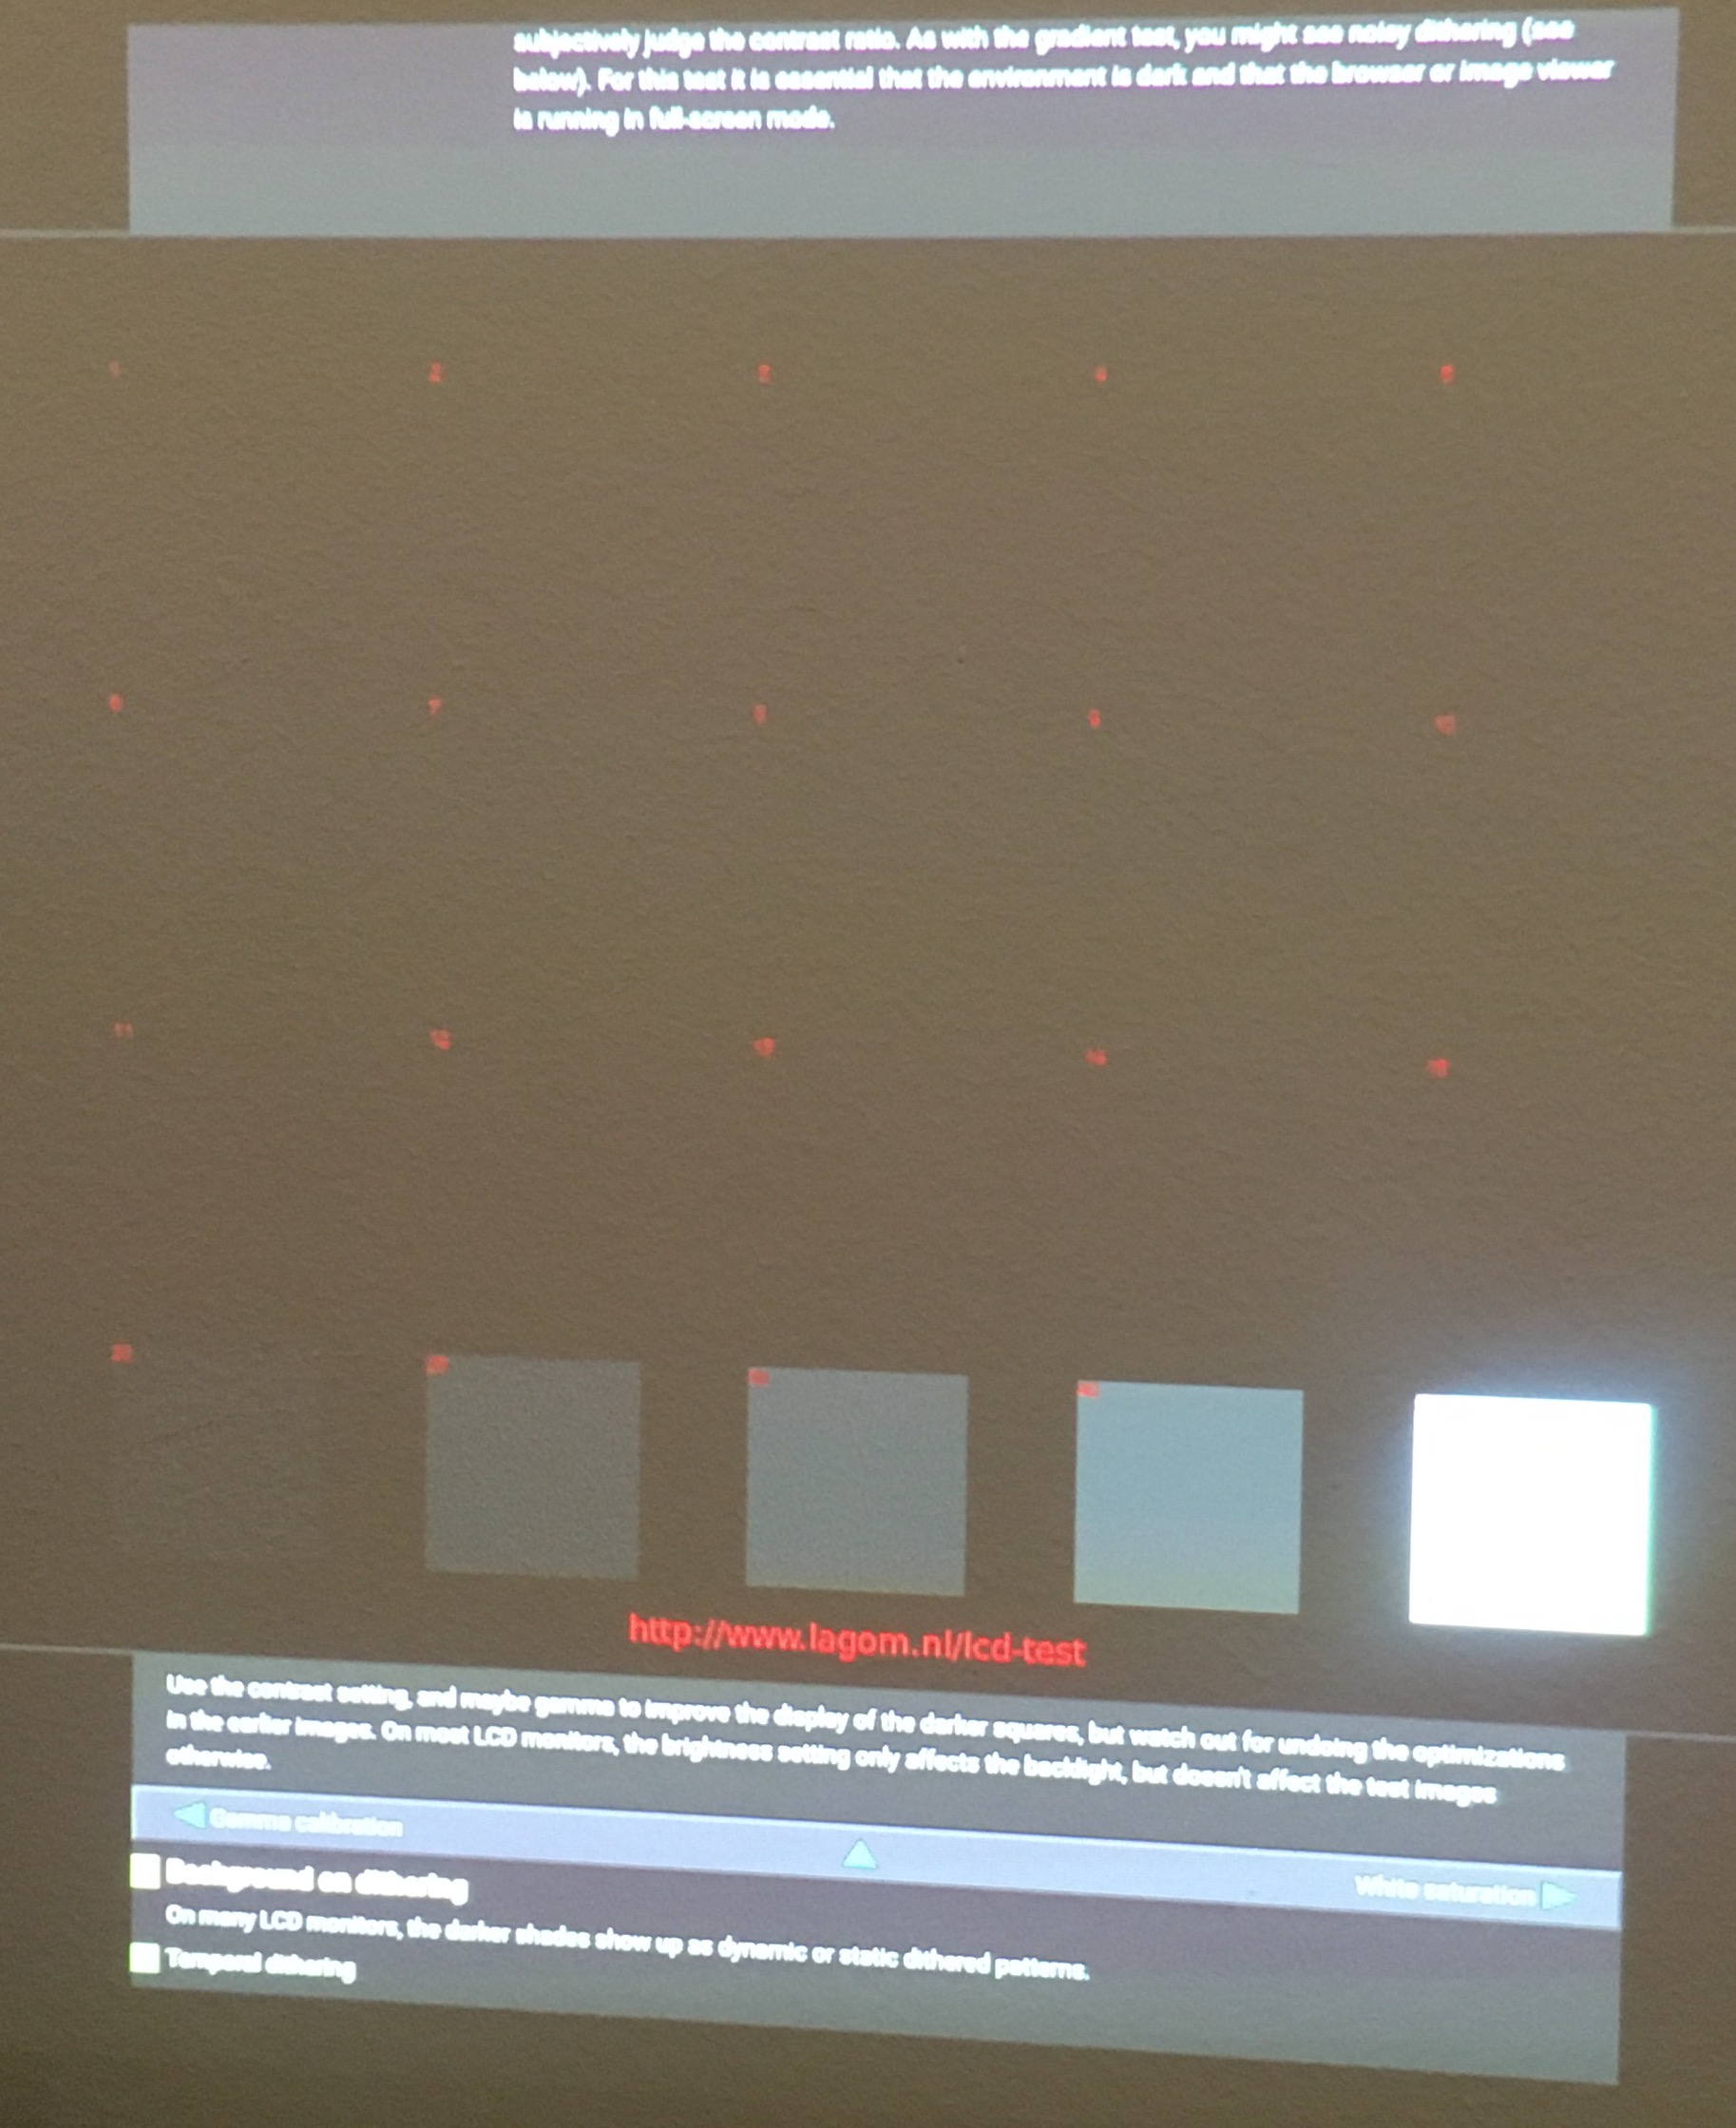
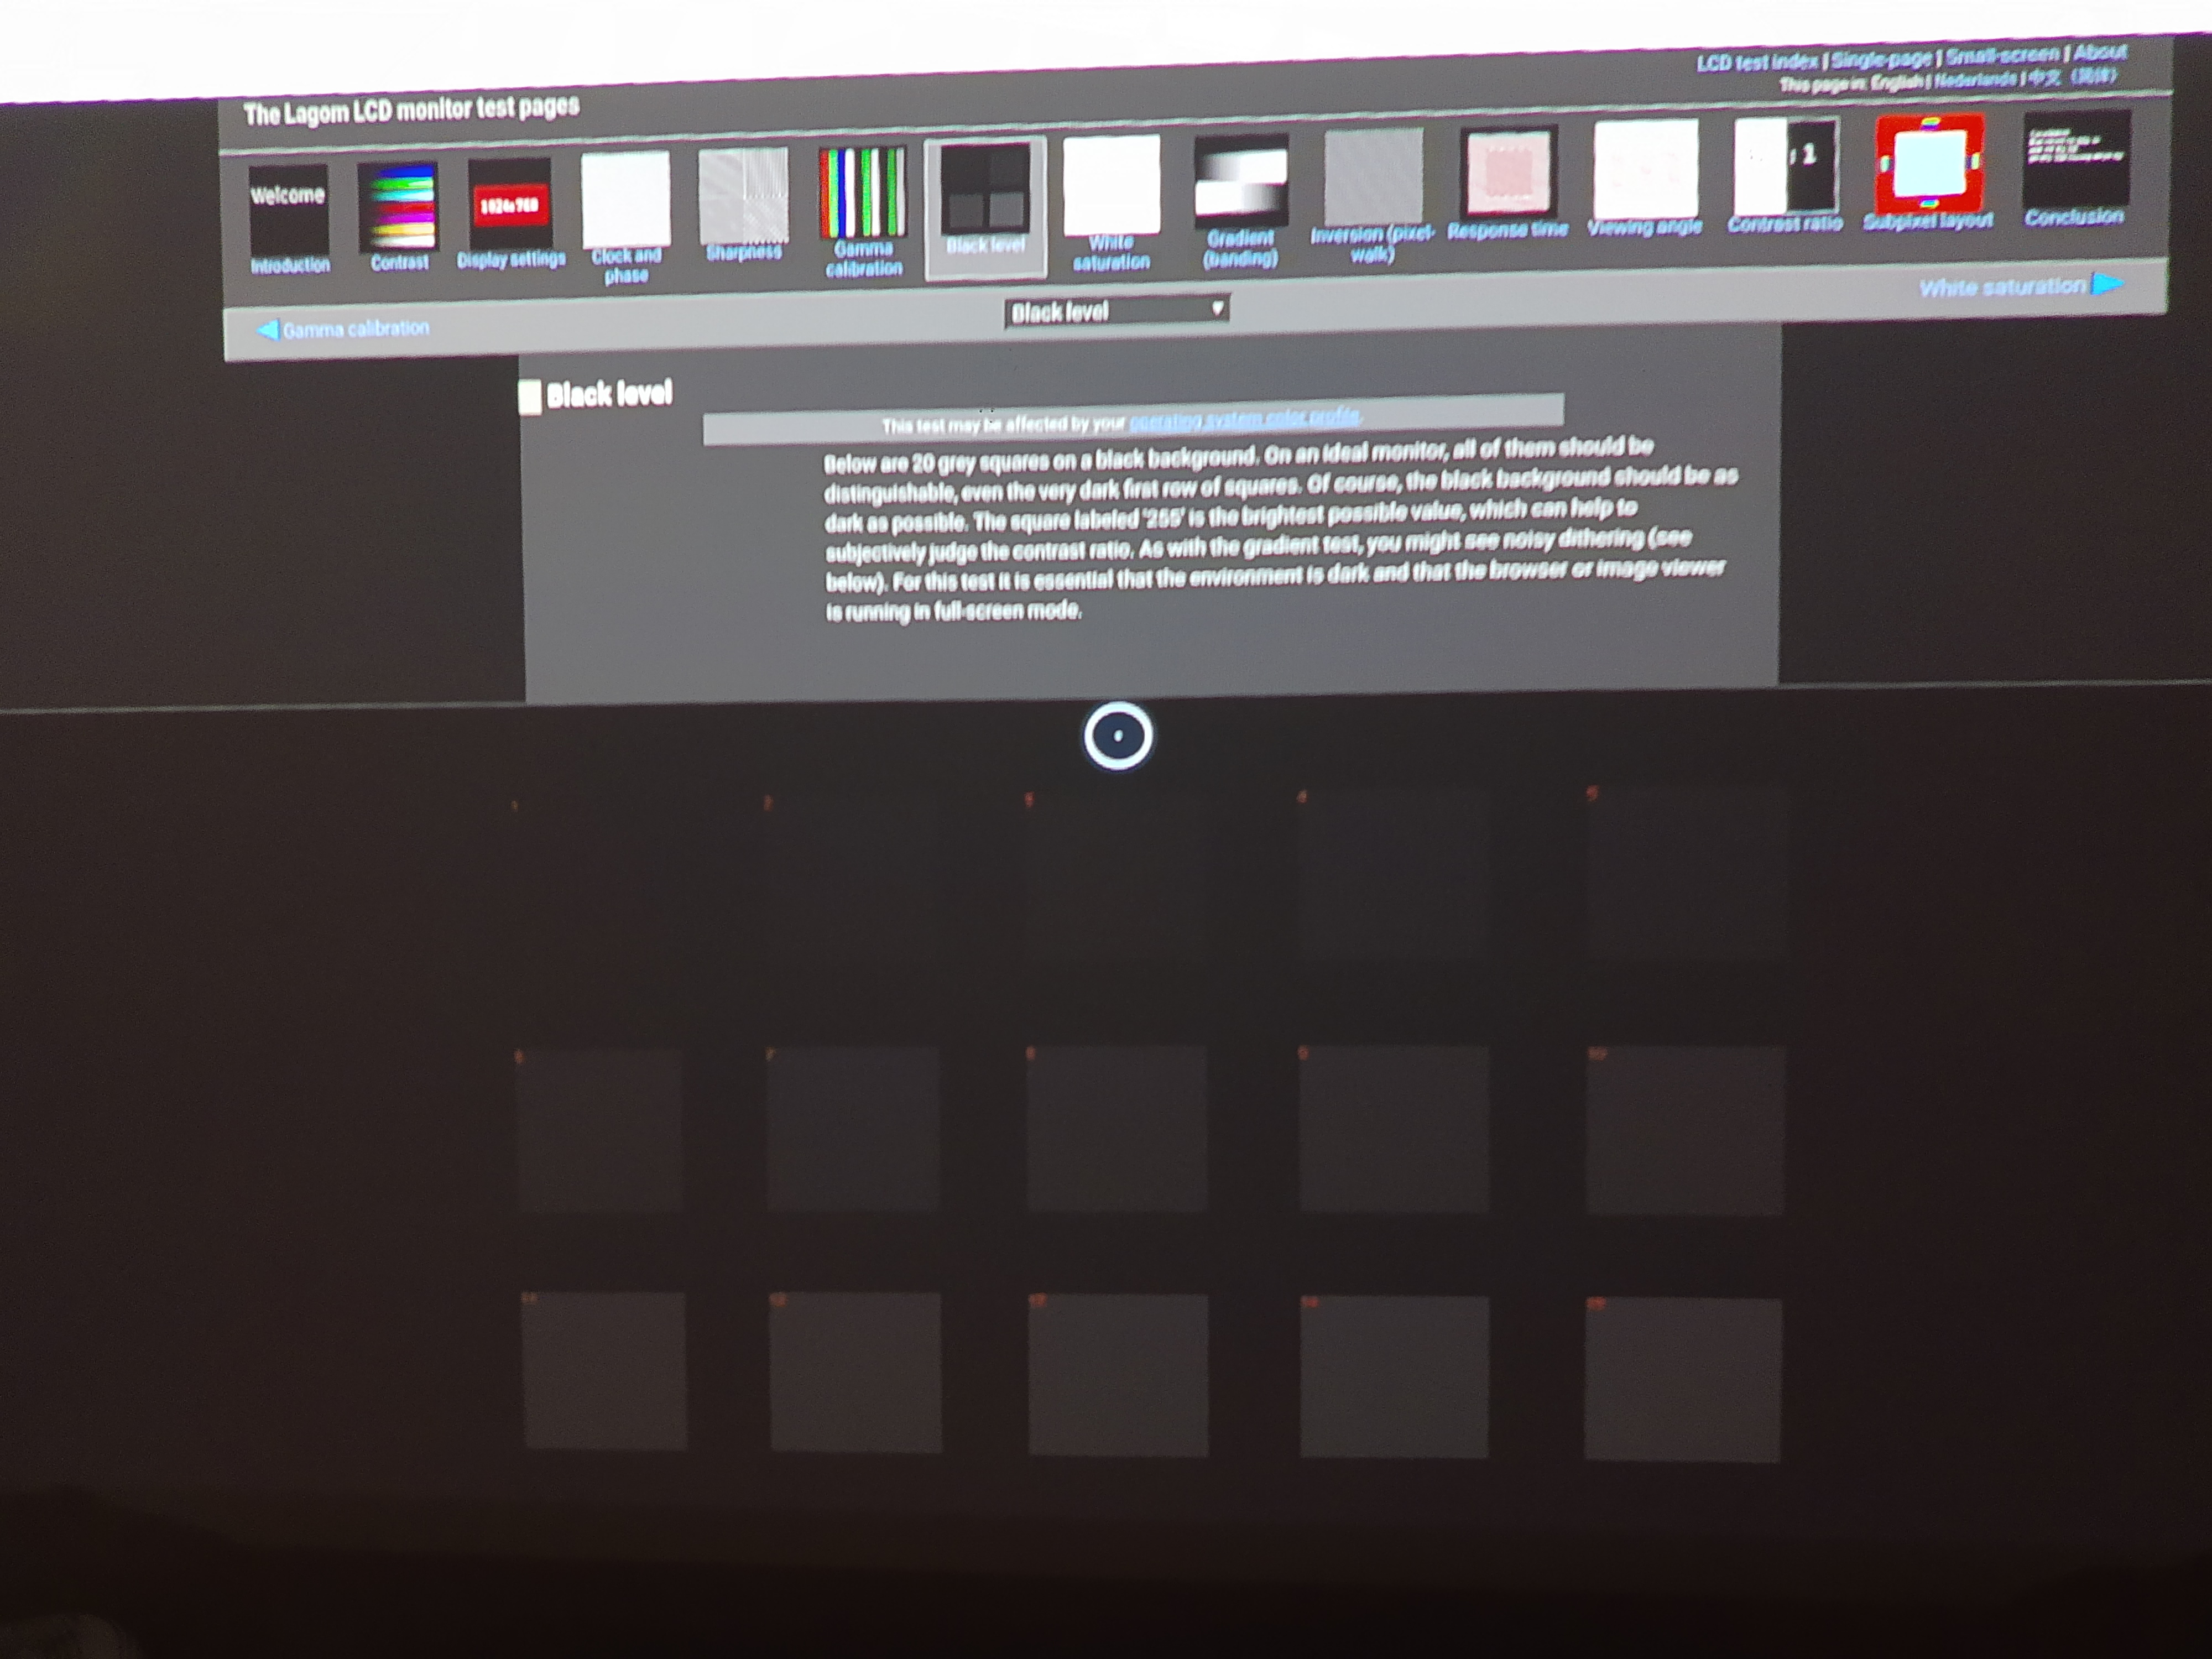
This looks normal. You can see all the black squares. You’ve made the modification correctly. In the ‘bad image’ you cannot see any of the black squares except the bottom row with the white square.
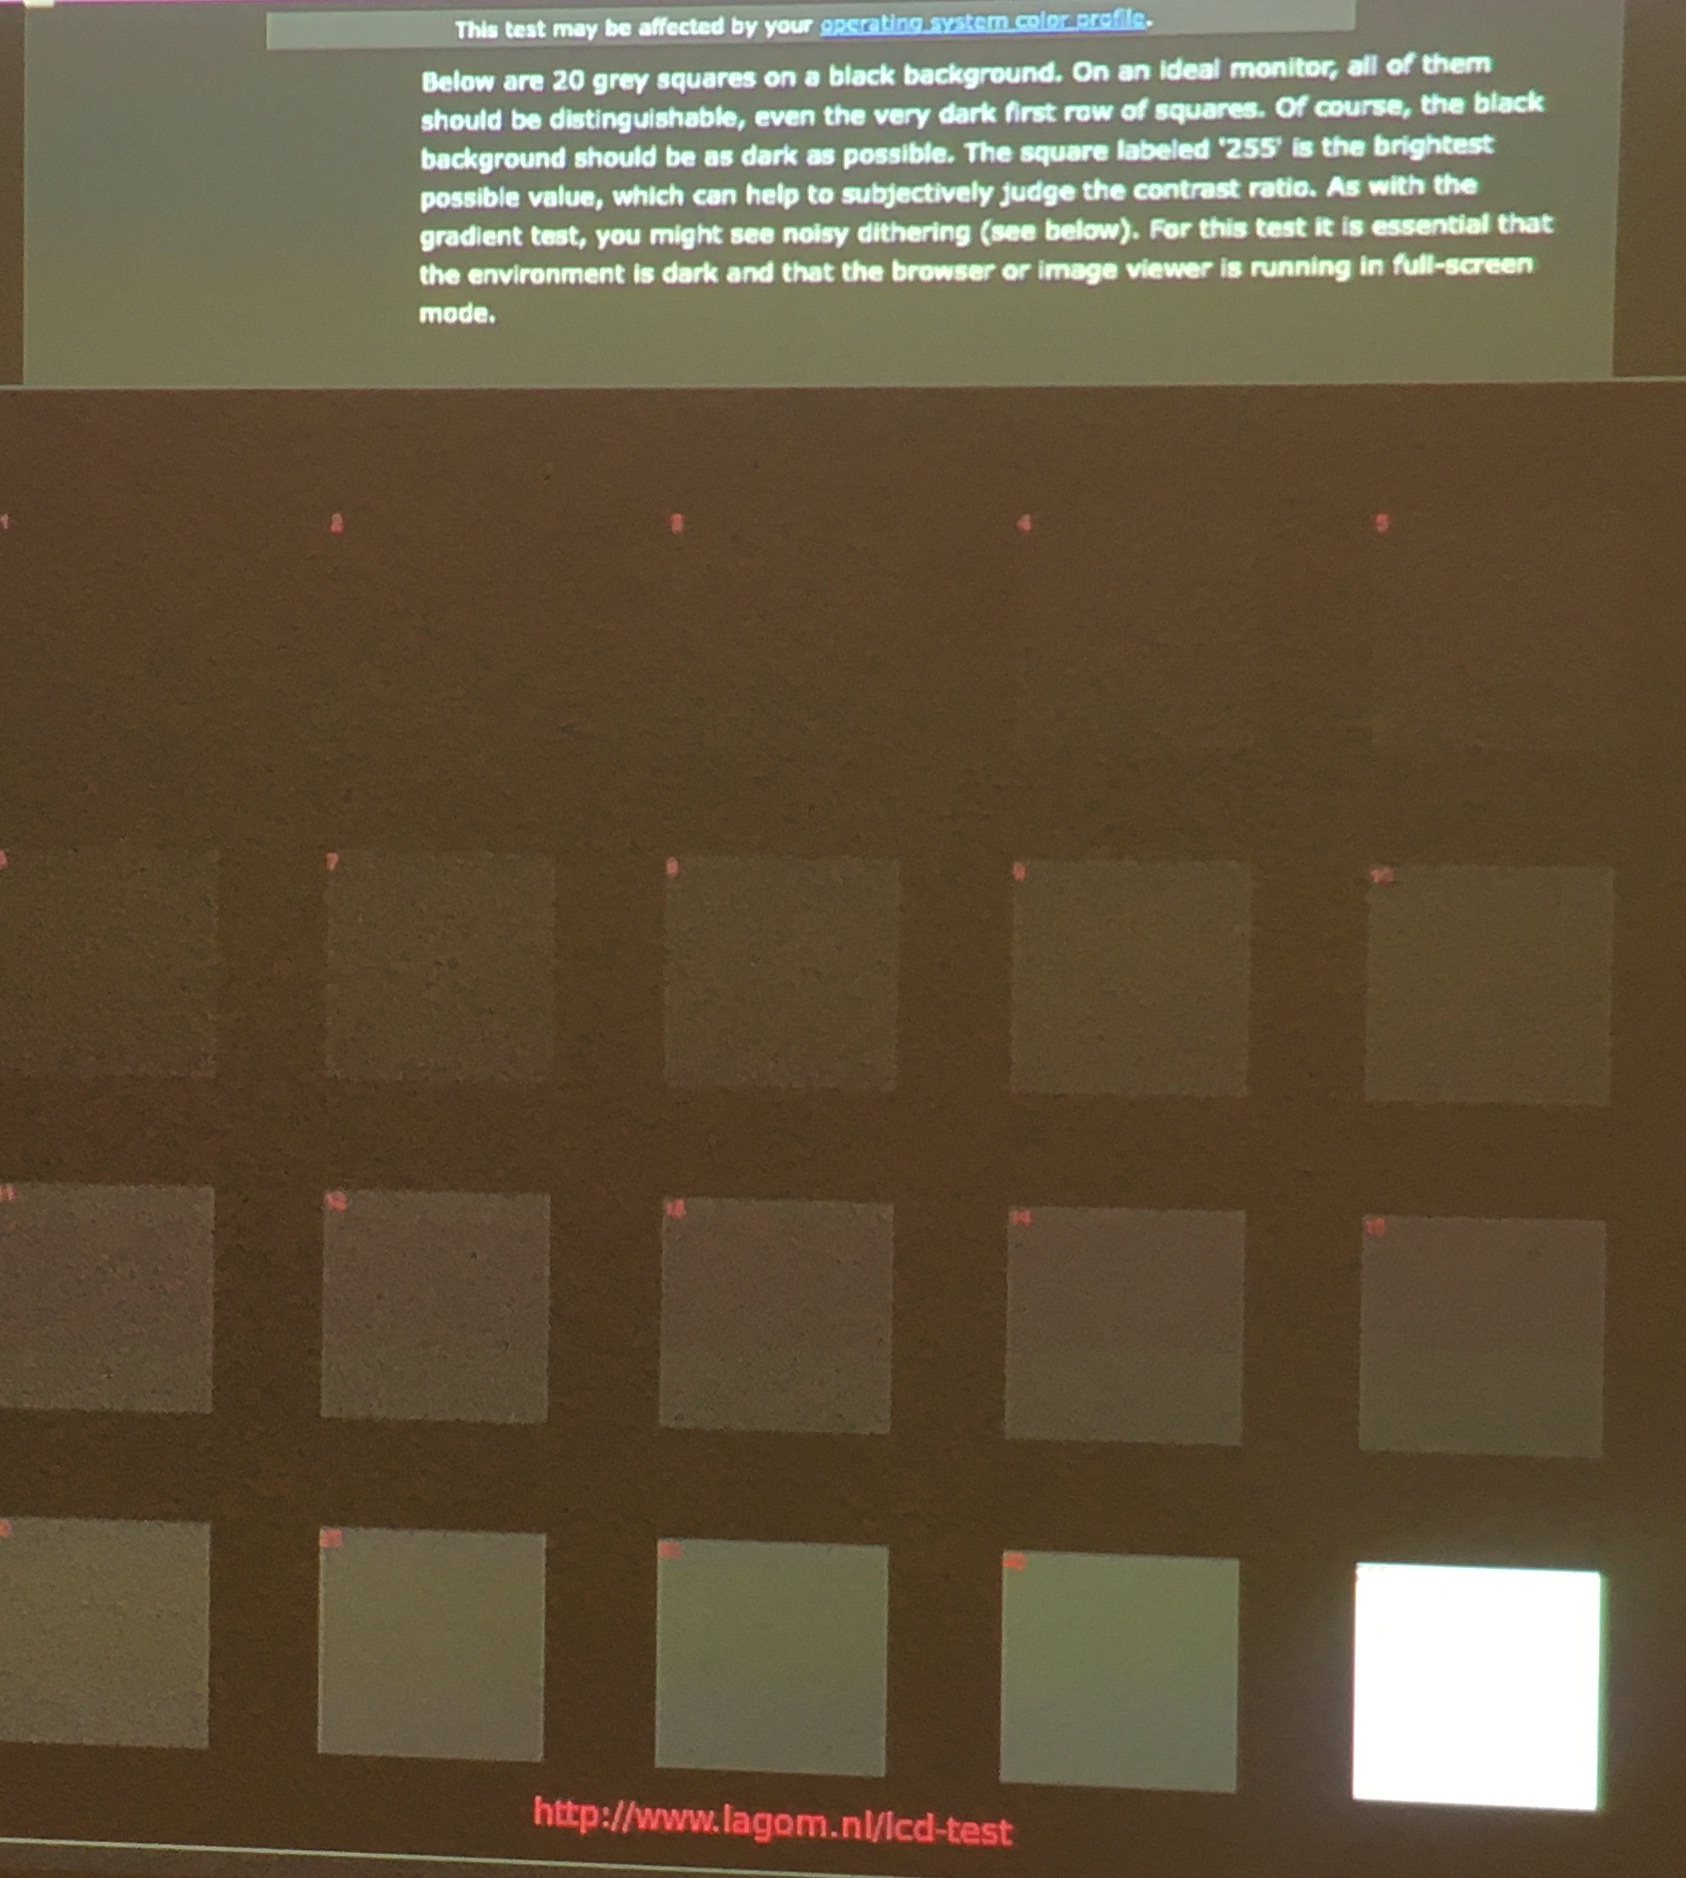
After correcting the image via the hack the squares are visible as in the screen. Didnt achieve it with the normal image corrections though. So I think theres still work to do with the settings.
Original Post:
Well, Ive got this bad situation with just only the bottom row and nothing else. Firmware 1. 0.27, the hidden menu-hack is working when clicking 5x on the Software version in the About section, but will it still influence the pic ?